Total: €0,00
Taxes and shipping calculated at checkout

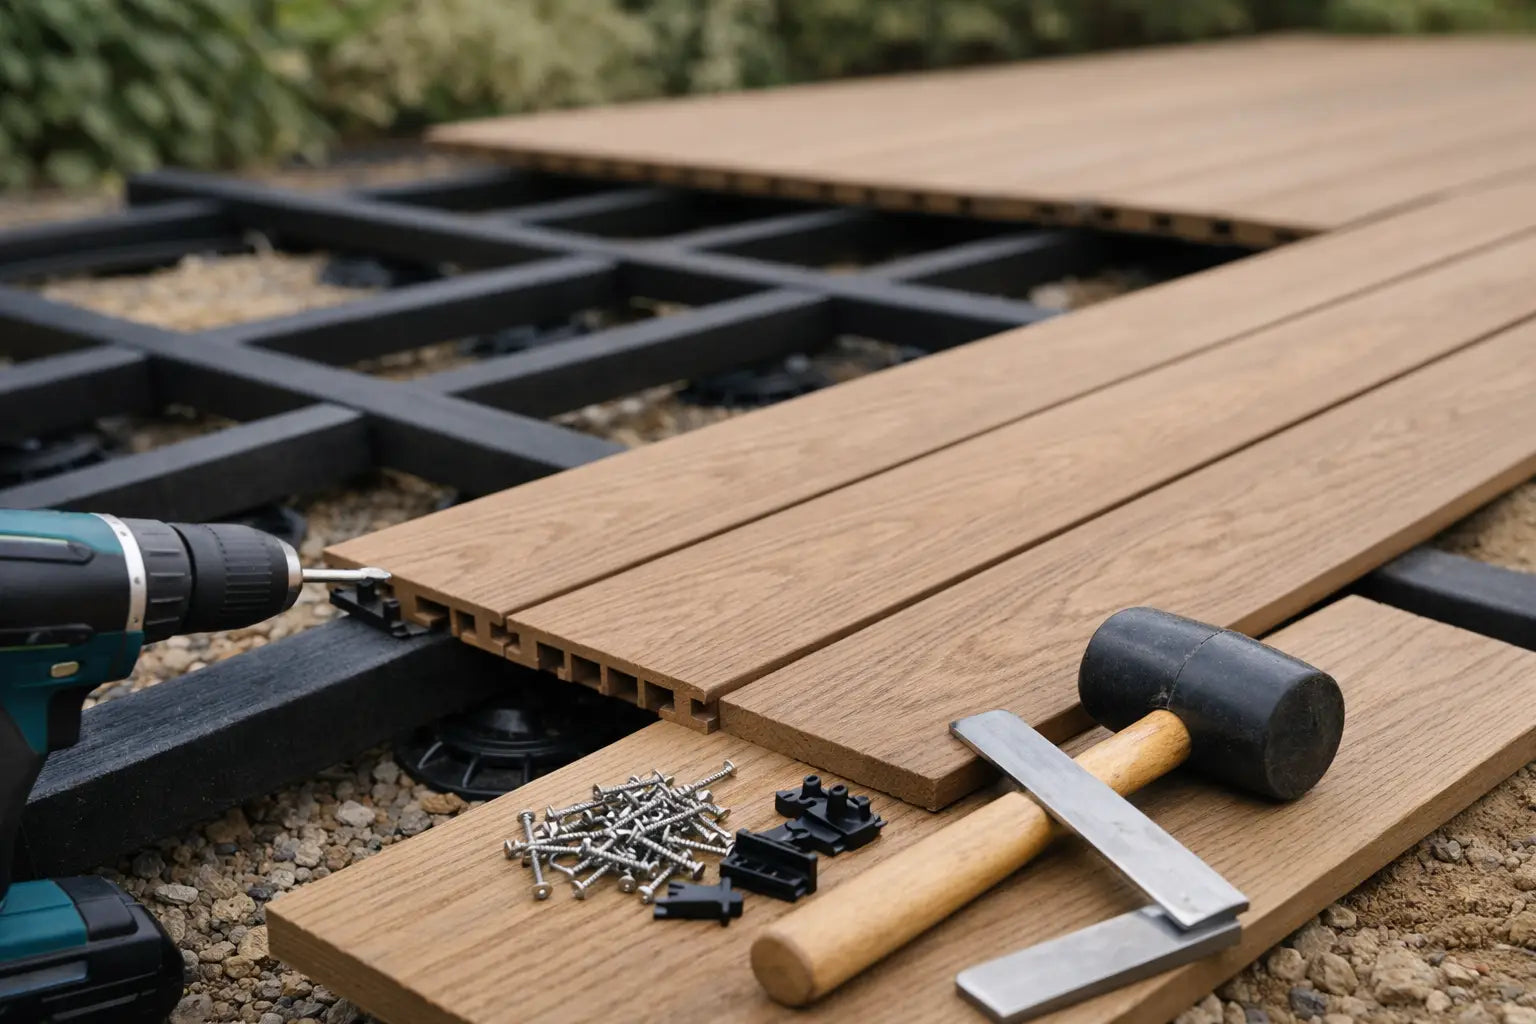
A composite deck will only remain neat and tidy if the substructure beneath it is correctly installed. Laying deck boards on joists therefore requires more than just cutting boards to size and clicking them into place. The right sub-base, joist spacing, and ventilation space determine whether your deck remains stable, neat, and low-maintenance for years to come.
Composite combines the warm appearance of wood with a modern, weather-resistant finish. You don't need to sand, stain, or oil, but proper installation remains essential. With this practical approach, you can build a sturdy deck that drains well and looks professional.
Don't start with the first board, but with the design. Determine the direction in which the deck boards will run and where you want the visible side to be. Boards laid lengthwise in a garden often make a narrow space appear longer. If they run from the house to the garden, they create more depth.
The joists should always be laid perpendicular to the deck boards. Also, consider drainage. Let the deck slope slightly, preferably away from the facade. A slope of approximately 1 to 2 centimetres per metre is usually sufficient to allow rainwater to drain away in a controlled manner, without the deck appearing visibly slanted.
Never install boards completely enclosed between walls, kerbs, or fixed objects. Composite material expands and contracts with temperature changes. This natural expansion is limited but must be accommodated.
Joists should not be placed directly on soil, grass, or loose tiles. Moisture that remains under the structure can cause subsidence and hinders ventilation. The result is a deck that may eventually become uneven.
For a durable base, first remove the top layer of soil and apply a level, compacted foundation. Consider stabilisation sand, crushed rubble, or another load-bearing sub-base that suits the soil and the load on the deck. On this base, you can place concrete tiles, kerbs, or adjustable deck supports.
Adjustable deck supports are particularly practical for height differences, roof terraces, and projects where you want to hide pipes under the deck. With tile supports, you can accurately align the joists and easily maintain the slope. For a low deck, sturdy concrete tiles are often a smart and economical solution.
Always ensure free drainage of water. A composite deck is weather-resistant, but the frame needs to be able to dry out. Therefore, leave enough open space under the joists and prevent enclosed edges where leaves, water, and dirt can accumulate.
The centre-to-centre distance is the distance from the centre of one joist to the centre of the next. This is one of the most important measurements when laying deck boards on joists. If the distance is too great, the boards can sag. If it's unnecessarily small, you'll use more material than necessary.
For many composite deck boards, a centre-to-centre distance of approximately 30 to 35 centimetres applies. For higher loads, such as a deck with heavy garden furniture, an outdoor kitchen, or intensive use, a smaller spacing may be advisable. The thickness, profile, and maximum span of the chosen board are also determining factors.
Therefore, always follow the installation instructions for the specific board type. A solid composite board often has different requirements than a hollow-core board. The technical dimensions of your product always take precedence over a general guideline.
Check each joist with a long spirit level or straightedge. Small height differences under loose joists may not be immediately apparent but become visible once the deck is laid. Take your time with this: a level frame provides a neat end result and prevents unnecessary corrections during installation.
It's not just the spacing between the joists that matters. The spacing between the support points under each joist must also be correct. Joists that span too freely can sag. This will cause your deck to lose its flat appearance, even if the boards themselves are correctly installed.
Place support points at regular intervals according to the installation instructions of the joist system. For deck supports, this means that each joist is supported at multiple points. For concrete tiles or foundation strips, ensure that the joist cannot spring loose anywhere.
Do not allow joists to stand in water and do not screw them tightly against a sealed sub-base without drainage. A structure with air circulation dries faster after rain and remains stable longer. This is particularly relevant in sheltered areas, under canopies, and on the north side of a house.
Composite boards expand and contract due to temperature changes. Therefore, use clips and end finishes designed for the chosen system. The clips maintain an even gap between the boards and allow the material space to move.
The gap between the boards is not only for a neat line. Water drains through this opening, and air can circulate under the deck. So, don't make the gaps narrower because you prefer a closed floor. A too narrow gap increases the risk of dirt accumulation, water problems, and pressure between the boards.
Also, leave sufficient expansion space at the ends and along walls. The exact distance varies per product, board length, and installation temperature. Measure this in advance and maintain the same space along the entire length of the deck. A neat edge finish should never clamp the board.
The first board determines the rest of the deck. Therefore, do not lay it by feel, but use a taut line, try square, or laser. If the first board is even slightly crooked, that difference will become visibly pronounced over several metres.
Install the starter clip on each joist and place the first deck board firmly in position. Then use the matching mounting clips for the next board. Drive screws in straight and tighten them until the clip is firmly clamped. Do not overtighten, as this can deform the clip or cause the board to lose its necessary freedom of movement.
After every three to five boards, check if the gaps are straight. Also, periodically measure the total width. A small deviation can then be corrected early, instead of only discovering at the last board that a narrow, crooked strip remains.
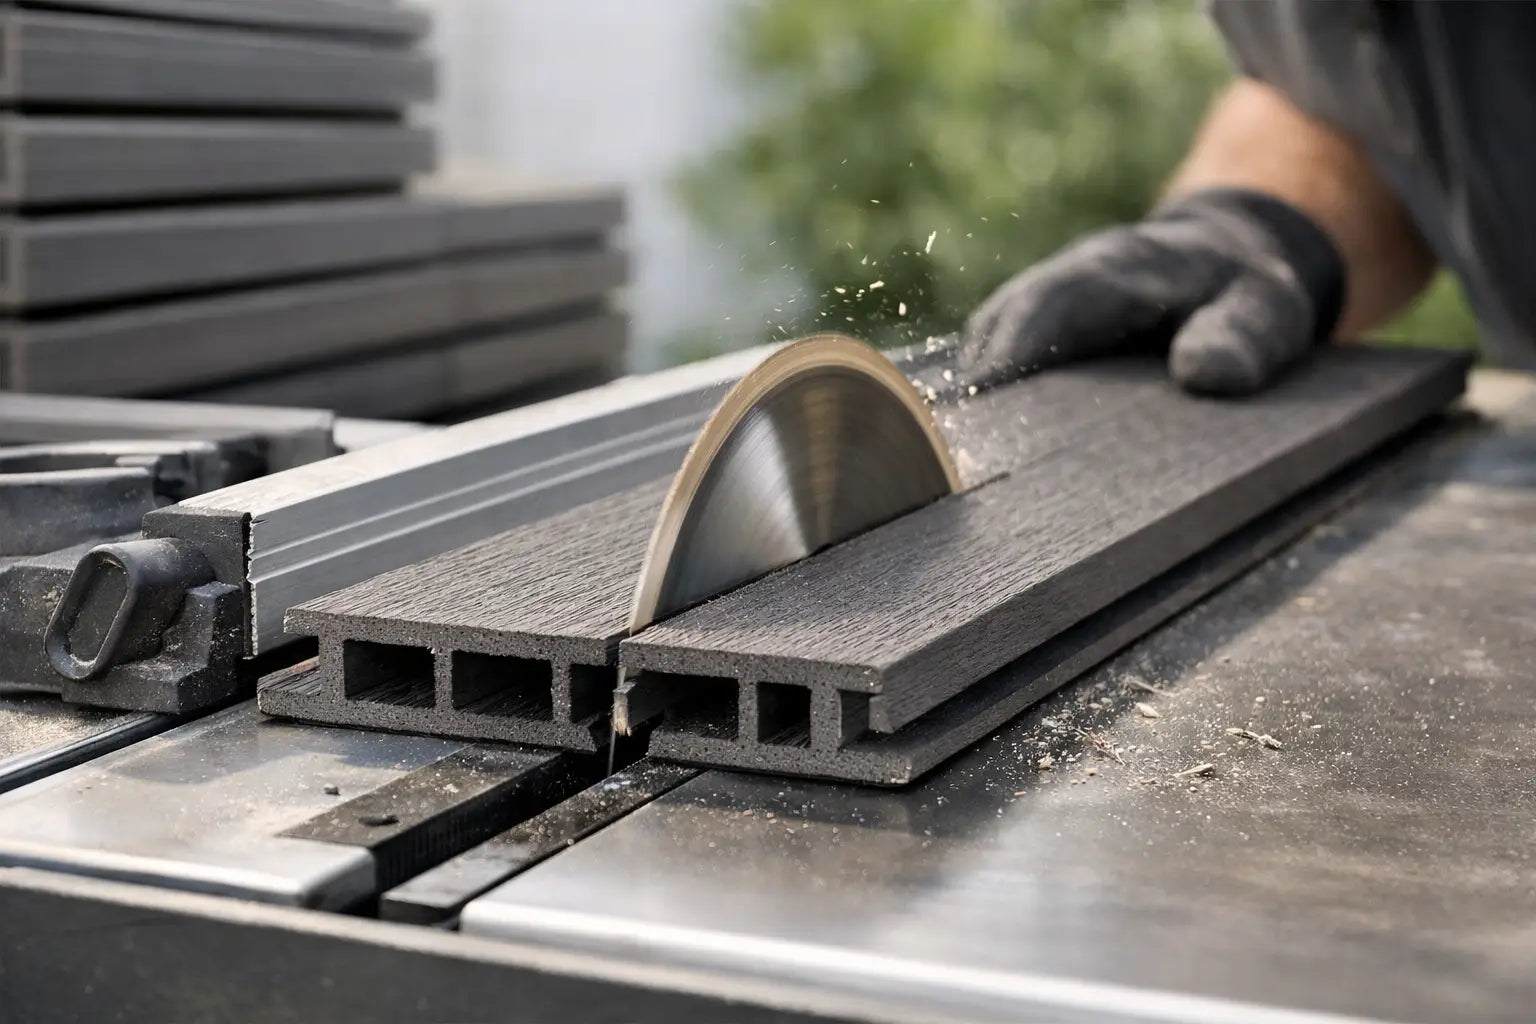
Cut boards with a fine-toothed saw blade suitable for composite. Support the board well while sawing to minimize splintering at the edge. Finish cut ends according to the chosen system, for example, with an end cap, fascia board, or trim profile.
A well-laid deck is recognised by the details. Open sides of hollow-core boards require a neat finish. With matching fascia boards or trim profiles, you create a closed, modern edge that largely hides the substructure.
Even with edge finishing, maintain ventilation. Do not completely seal the side if air cannot get under the deck. A small, inconspicuous opening at the bottom helps drain water and moisture.
At corners and large decks, expansion joints are often necessary. Especially when boards are laid in long lengths, it is wise to divide the deck into manageable sections. This gives the composite space to work and makes the construction calmer and more controllable.
Those who want to build quickly often underestimate the substructure. These four mistakes most often cause problems:
For a composite deck, the board, joist, clip, and finish work best as one system. This makes dimensions clearer, provides a more consistent end result, and prevents individual components from not fitting together properly. At WPC Solutions, you'll find low-maintenance composite solutions that allow you to finish your deck in a modern and sleek way, from the first joist to the last fascia board.
Plan the construction before ordering, measure the available height including the substructure, and check the technical specifications of your chosen board. This way, you will not only lay a beautiful deck for this season, but an outdoor floor that you can enjoy carefree for years to come.