Total: €0,00
Taxes and shipping calculated at checkout

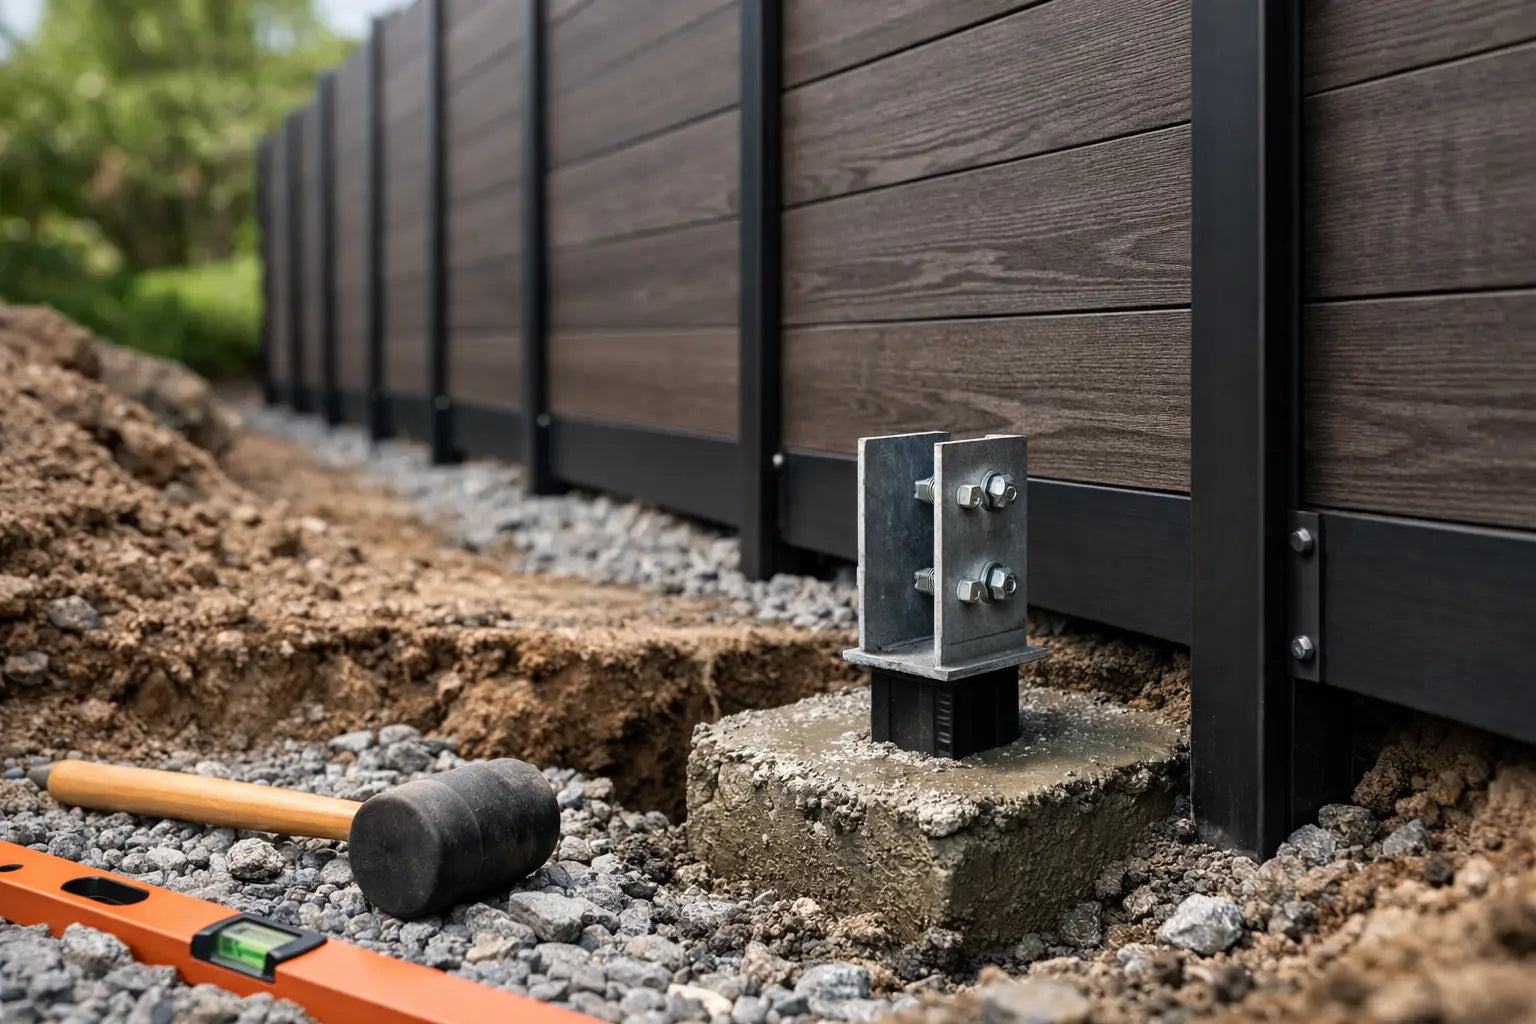
A fence that sags after just one winter rarely has a problem with the panels or composite boards. Almost always, the issue starts underground. With this fence foundation guide, you will lay the groundwork for a sleek fence that can withstand wind, rain, and varying temperatures – and that will look well-maintained for years.
Especially with a modern composite fence, a stable foundation is essential. Composite is low-maintenance, colorfast, and dimensionally stable, but a tall, dense fence panel catches a lot of wind. Therefore, don't just choose based on aesthetics, but carefully match the post, foundation depth, and soil type.
The foundation carries more than just the weight of the fence. It prevents posts from tilting, heaving due to frost, or slowly sinking into wet ground. A post that moves only a few centimeters can already lead to crooked boards, uneven gaps, and extra stress on the entire system.
This risk increases with solid fences. Where an open fence allows wind to pass through, a dense composite wall acts like a sail. The higher and longer the fence, the greater the forces on the posts. A well-installed foundation is therefore not an invisible side issue, but the structural core of your project.
The appearance also benefits directly. Straight posts ensure clean lines, uniform panels, and a neat connection to a garden gate or corner solution. This is precisely the difference you see in a professionally finished garden.
First, examine the soil in your garden before ordering posts or digging holes. Sandy soil usually drains water well and is relatively easy to compact. Clay soil is heavier, retains moisture longer, and can be more active in dry conditions or frost. For loam, loose backfill, or a garden that often stays wet, extra attention to depth and drainage is advisable.
Also check the elevation difference in your garden. A fence on a slope requires a different approach than a completely flat plot. Do not use posts that are all installed at the exact same length if the ground slopes. Determine beforehand whether you will keep the top of the fence straight or follow the panels in steps. This prevents improvisation once the first post is already set.
Furthermore, in many parts of the United States, frost depth varies by region. Always consult local building codes and HOA rules where applicable. In areas with severe frost, the post base often needs to be deeper than in a warm climate, so that freezing ground does not push the structure upwards.
As a practical rule of thumb, about one-third of the total post length goes into the ground. For a fence approximately 6 ft high, this often means a post of about 8 ft, with about 2 ft below ground level. For a higher, fully enclosed fence, a windy location, or soft ground, more depth is often the better choice.
Don't just look at the visible height. Also include the desired ground clearance. Composite boards should not be in prolonged contact with soil or standing water. Leave space at the bottom for drainage, a gravel strip, or an edge restraint. This limits splashing dirt and keeps the bottom of the fence neatly accessible.
The diameter of the hole is also important. A narrow hole makes it more difficult to set the post exactly level and provides less stability at the base. For most projects, a hole that is significantly wider than the post is practical. This leaves room for gravel, concrete, or well-compacted infill material.
Concrete is a strong choice for heavy composite fences, corner posts, end posts, and locations with high wind loads. It fixes the post and provides immediate, reliable support. Set the post carefully level, as correcting it after the concrete has cured wastes unnecessary time.
Gravel at the bottom of the hole helps with drainage. A layer of coarse gravel prevents water from standing around the post base for extended periods and provides a sturdy subsoil. With a concrete base, gravel as a drainage layer is often smart, but do not create a bowl where water can collect. Allow the top of the concrete to slope slightly away from the post so that rainwater can drain off.
Post anchors or ground screws can be a good alternative for certain subsoils and light to medium-heavy systems. They allow for quick, dry installation and keep the post above ground. However, the load-bearing capacity depends entirely on the soil type, length, product type, and load. For a high, closed fence, they are only suitable if the manufacturer and local conditions permit.
A composite fence is a system. The boards, rails, slotted posts, caps, and fastening materials must be compatible. Therefore, use posts with sufficient wall thickness and a profile that matches the chosen panels. A post that is too light can twist, while an incorrect profile can compromise the sleek finish.
Aluminum posts are popular with composite systems due to their modern appearance, high dimensional stability, and low-maintenance character. They do not rust like untreated steel and form a neat combination with anthracite, black, teak, and other composite colors. Please note: an aluminum post is only as strong as its anchoring. A premium post in a shallow hole does not solve the foundation problem.
First, install end and corner posts. Then stretch a builder's line at the desired line and height. This immediately shows whether the property line is being followed straight and prevents small deviations from accumulating over the entire length. Also measure the center-to-center distance accurately so that your fence panels fit without cutting, clamping, or unwanted gaps.
Dig all holes before permanently setting the first post. This provides an overview and makes it easier to correct the line. Mark the locations with stakes and double-check the distance between the posts. Especially with gates, accuracy is crucial: a few millimeters difference can later be noticeable when closing.
Start with a corner or end post. Apply gravel at the bottom, set the post to the correct depth, and check it with a spirit level on two sides. Use temporary braces so that the post does not shift during pouring or compacting. Repeat this with the second end post and then stretch a cord between both points.
Place the intermediate posts along the cord, but do not rely solely on sight. Remeasure each post and check the height of the slots or attachment points. With composite boards, each level must align neatly. Take your time with this: an extra half hour during the foundation stage prevents hours of repair work during assembly.
Allow concrete to cure sufficiently before installing heavy fence panels. The exact waiting time depends on the product, temperature, and weather conditions. Do not load a fresh foundation immediately, even if the surface feels hard.
Not every post receives the same load. A corner post catches forces from two directions. An end post bears the tension of an entire fence line. Posts next to a garden gate also have to deal with repeated opening, closing, and possibly sagging hardware. These areas deserve a deeper or heavier foundation than a standard intermediate post.
Do you live next to an open field, coastal area, or on a corner plot? Then expect extra wind pressure. Where possible, opt for shorter panel lengths, a heavier post construction, or additional reinforcement. With existing walls, attaching to the facade is not automatically a solution: first check whether the wall is structurally suitable and take waterproofing into account.
The most common mistake is placing posts too shallow. That seems faster and cheaper, but often becomes visible after the first storm or wet winter. A second mistake is placing posts directly in boggy ground without gravel or proper anchoring. The post will then be temporarily straight, but will not have a stable base.
Incorrect post spacing also causes problems. Composite boards can expand and contract with temperature differences. Therefore, always follow the prescribed distances and leave the necessary expansion space. Never force boards into an opening that is slightly too small.
Furthermore, the property line is sometimes only checked when installation has already begun. This can be a costly mistake. If in doubt, have the property boundary determined beforehand and discuss height, design, and placement with your neighbors. This provides clarity and prevents discussions later.
A modern fence should not require attention every season. With a deep, straight, and well-drained foundation, you give composite boards, aluminum posts, and a garden gate the stable base they need. WPC Solutions offers complete composite systems with which you can consistently achieve that low-maintenance, sleek look.
Measure carefully, choose materials that work together as a system, and adapt the foundation to your soil and wind load. Then you will not only build a fence, but a permanent feature in your garden that you will enjoy every day.