Total: €0,00
Taxes and shipping calculated at checkout

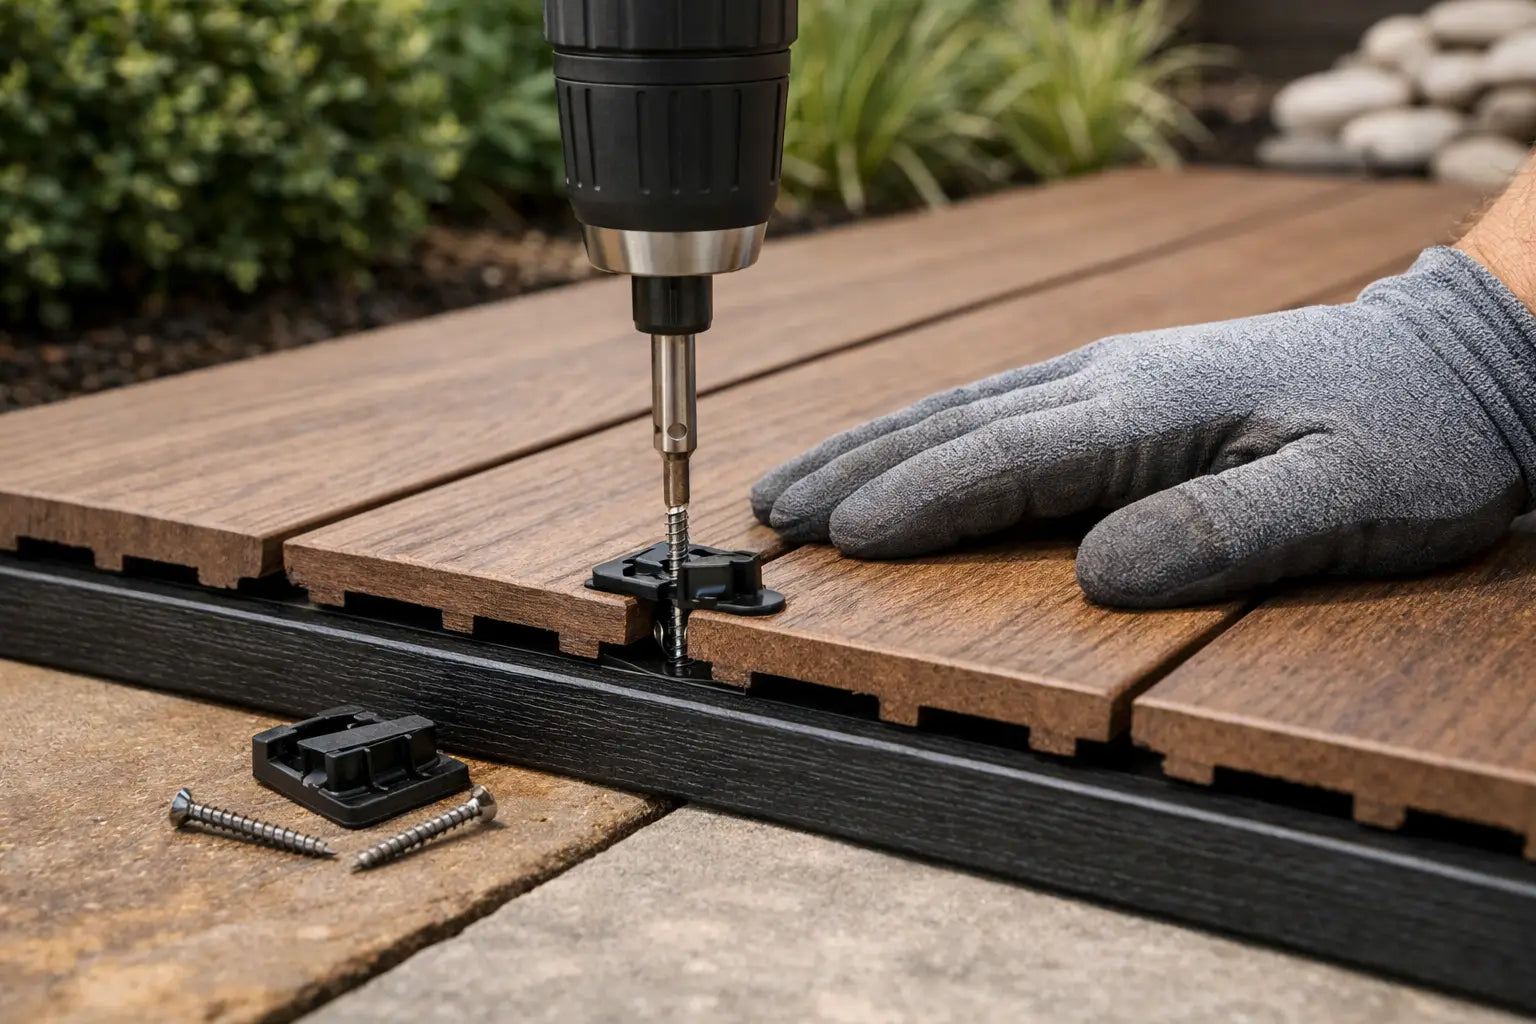
Visible screw heads can make a new deck unnecessarily busy. Those who want to install deck boards with hidden fixings choose a sleek surface where the color, wood grain, and lines of the composite boards are fully showcased. The result looks more premium, feels more pleasant under bare feet, and prevents screws from interrupting the surface. Installation does require a good substructure, the correct clips, and sufficient space for material expansion and contraction.
With hidden installation, the fasteners are placed in the groove on the side of the board. The clip connects the deck board to the underlying joist, while the next board covers the fixing. This keeps the walking surface free of visible screws and drill holes.
For a composite deck, this is more than an aesthetic choice. Composite boards have a uniform, modern look that is better showcased without metal fastening points. Dirt and moisture also have less chance of accumulating around screw heads, making the deck easier to clean.
Hidden installation also has a practical advantage in case of replacement. With many clip systems, you can locally detach a board without having to dismantle an entire deck. This does depend on the chosen system and the accessibility of the clips. Replacing a damaged board in the middle of a large area will always be more work than replacing a board at the outer edge.
For hidden fixing of deck boards, you typically use starter clips, mounting clips, and suitable screws. Starter clips are secured along the first board. The regular clips are then placed in the groove between two boards. They hold the boards in place and ensure a consistent joint width.
Only use clips that match the profile of your composite board. A universal clip may seem economical, but it can be too tight, too loose, or too high. This affects the joint, water drainage, and stability. With a complete system, the board, clip, screw, and finishing profile are coordinated. This results in a neater finish and prevents improvisation during installation.
The clip is usually secured to the substructure with one screw. Tighten it firmly, but do not force the clip. An overtightened screw can deform the clip or restrict the natural expansion of the board. The board should be secure, but not trapped.
A flat and stable deck starts underneath the boards. Use a load-bearing substructure that is suitable for outdoor use and provides sufficient support points. Composite joists are low-maintenance and visually complement a composite deck well. On an existing concrete slab or tiled floor, they can often be placed on rubber tile supports or shims, as long as water can drain freely.
Lay the joists perpendicular to the direction of the deck boards. Maintain the center-to-center distance prescribed for your type of board. For standard composite boards, this distance is often around 30 to 40 cm, but wide boards, hollow-core boards, and heavily used decks may require a smaller distance. Therefore, always check the installation specifications of the chosen product.
Ensure a slope of approximately 1 to 2 percent away from the house. This means a height difference of one to two centimeters per meter. Without a slope, rainwater will remain longer, increasing dirt, green growth, and moisture exposure. The boards themselves should never lie directly in puddles or on wet ground.
The first board determines the line of the entire deck. Don't just measure from the facade, as walls and paving are not always perfectly straight. Instead, use a string line or a laser to set a clean starting line. Then attach the starter clips at equal distances from each other on the substructure.
Place the first deck board into the starter clips and immediately check if it is square. Then slide a mounting clip into each groove at the height of a joist. Lay the next board against the clips, without hitting it hard. A rubber mallet with a protective block can help to gently connect the board.
Work board by board and regularly check the straight line. Small deviations are barely noticeable after three boards, but can lead to a crooked edge or uneven joint at the end of the deck. Therefore, measure not only at the beginning, but also halfway and at the last rows.