Total: €0,00
Taxes and shipping calculated at checkout

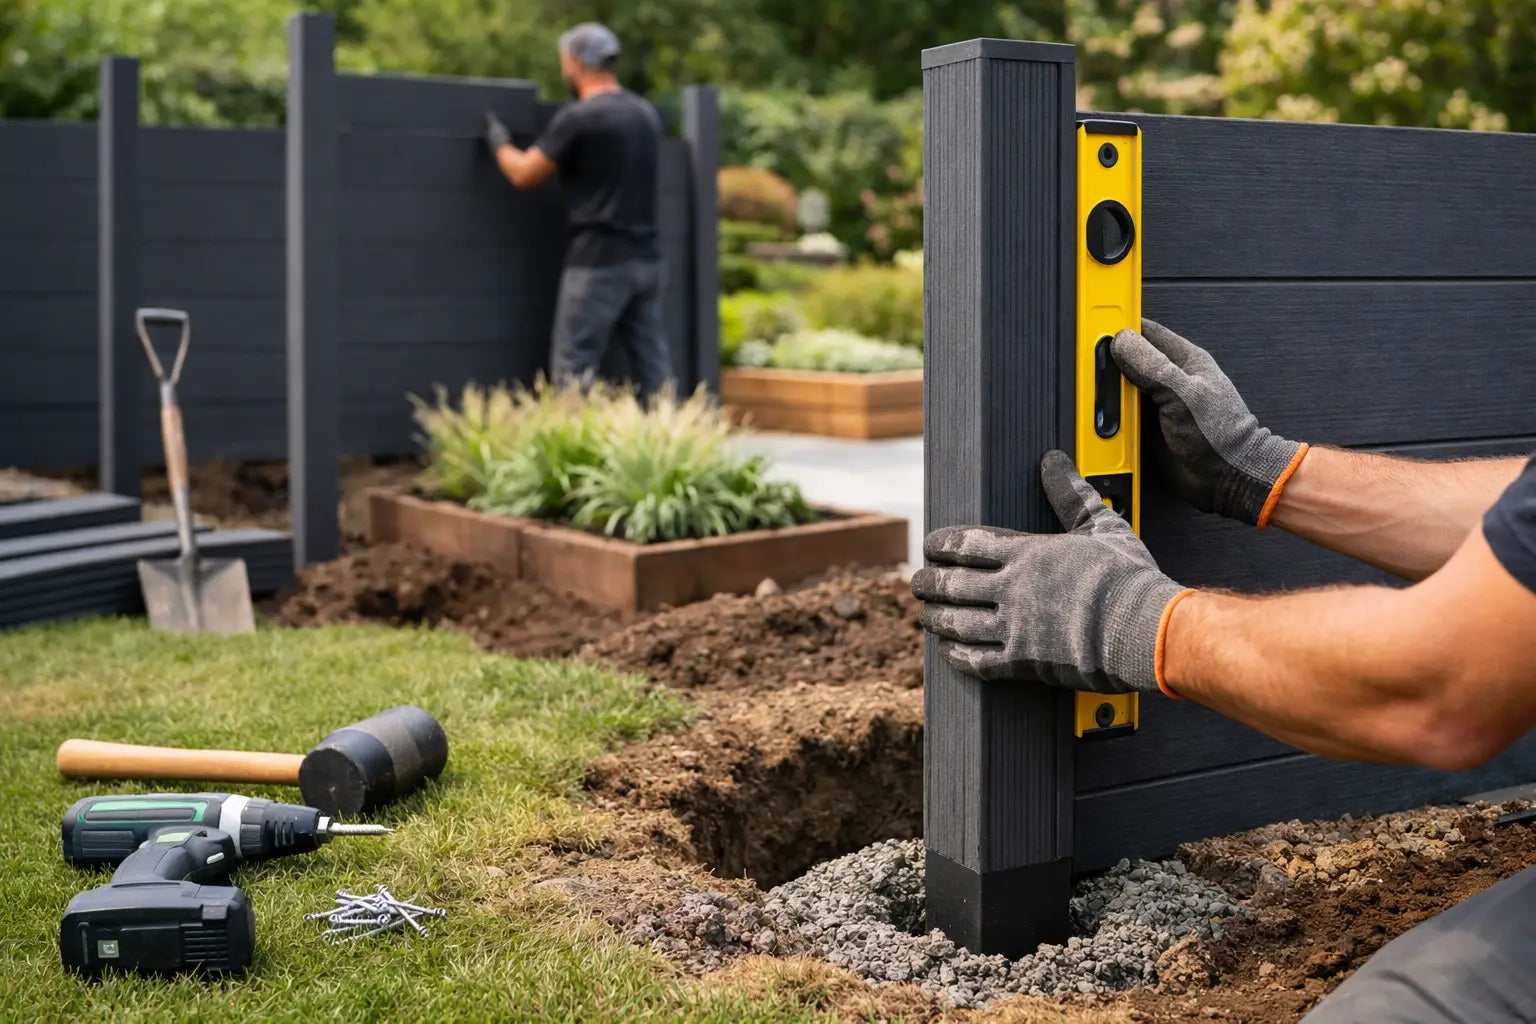
A fence is only as straight as the posts it rests on. Those who want to install composite garden posts should therefore not start with the planks, but with a straight line, a stable subsoil, and the correct center-to-center distance. Take your time with this. A post that is a few millimeters out of plumb will be visible along the entire length of the fence.
Composite fits well with a modern garden because it combines the warm look of wood with low maintenance. No annual staining, no splinters, and less risk of warping. Installation does require precision: composite works with temperature differences and needs a construction that drains water and absorbs movement.
First, stretch a mason's line along the entire property boundary. Place the line exactly where the front of the posts should come. Then measure the available length and divide it into equal sections. The correct distance depends on the chosen fence system, the height, and the wind load at the location.
For a standard composite fence, a center-to-center distance of approximately 70 to 90 inches is often common, depending on the length of the tongue and groove boards or panels. Always check the dimensions of the system you are using. Too large a span can cause boards to sag or move more than desired in strong winds.
Also, consider a garden gate, a corner, or a difference in height in the terrain. Do not place corner posts last. These posts, in particular, determine the direction of the entire line and deserve extra attention.
The subsoil determines how you anchor the posts. In firm, well-draining soil, you can set posts in concrete. On an existing concrete subsoil, patio, or low garden wall, you usually work with a metal base plate and suitable anchors. For a freestanding fence in an open, windy garden, a concrete foundation is often the most stable choice.
Dig a hole for each post that is wide enough to properly set the post. For an average garden fence, a hole of approximately 12 to 16 inches wide is a practical starting point. The depth depends on the post length, the soil, and the local frost line. In parts of the United States where the ground freezes deeply, the foundation must be below the frost line. Therefore, always check local building codes and any HOA rules before starting.
Ensure drainage at the bottom of the hole. A layer of gravel prevents water from pooling around the base. This is not only better for the construction but also makes it easier to accurately set the post to height.
Never place all posts directly in concrete one after another. Start with the first and last post of a straight fence line. Set each post level in two directions and check the height with a long spirit level or laser. Temporary braces hold the post in place while the concrete cures.
Mix the concrete according to the instructions on the package and fill the hole evenly. Press the concrete firmly, without pushing the post out of position. Let the top of the foundation slope slightly away from the post. Rainwater will then drain away instead of accumulating around the base.
Wait to install the fence sections until the foundation has sufficiently cured. Rushing the work seems to save time but increases the chance of misalignment. Especially with tall panels or wide fence sections, a stable base is not a detail but a prerequisite for a neat end result.
In many composite systems, a metal inner profile, post holder, or aluminum core forms the load-bearing structure. The composite outer layer provides the modern wood look, while the profile provides the sturdiness. Install this system exactly according to the prescribed direction: slots for tongue and groove boards, cover strips, and attachment points must all align correctly.
If you are working with a post base on concrete, first mark the drill holes. Drill with the correct drill for concrete and use anchors that are suitable for both the load and the subsoil. With old or porous concrete, a standard plug may not provide sufficient grip. In that case, a chemical anchor or an adapted fastening method is often more sensible.
Recheck the plumb of each post. Do not rely solely on the string. A tightly stretched line helps with the position but does not tell you if a post is leaning forward or backward. That extra check takes minutes and prevents corrective work once the fence planks are already installed.
Composite is low-maintenance, but not completely dimensionally stable under all temperatures. When warm, the material can expand slightly, and when cold, it can shrink again. Therefore, leave the prescribed expansion gap at the ends of tongue and groove boards and between fixed components. Never clamp planks tightly if the system is designed to slide into grooves.
Do not install the bottom plank directly on the ground. A small clearance prevents splashing dirt, makes cleaning easier, and allows rainwater to drain. In a sloping garden, you can opt for a stepped construction or for sections that follow the ground level. A slanted top line sometimes looks calmer but requires precise customization of the planks and profiles.
Use only fasteners suitable for outdoor use. Stainless steel screws or the system clips that belong to the fence keep the finish neat and limit the risk of rust spots. Screws that are too long or incorrectly placed can damage composite or remain undesirably visible.
The finish makes the difference between a functional property boundary and a fence that truly becomes part of your garden design. Install post caps or cover profiles only when all posts, planks, and any doors have been checked. This prevents you from having to remove components again for a small correction.
Pay attention to the same sightline for each post. The height of the caps, the direction of the wood grain, and the connection of the planks must be consistent. This applies especially to anthracite, black, or teak-colored composite: a modern, even color shows deviations faster than a natural wooden fence.
After installation, clean the surface with lukewarm water and a soft brush. It is better to remove cement residue, drilling dust, or soil immediately than to let it sit for weeks. Avoid aggressive solvents and abrasive sponges. These are not necessary and can dull the top layer.
Most problems arise not from the composite itself, but from an incorrect sub-construction. Posts that are too shallow, insufficiently cured concrete, incorrect section dimensions, or no room for expansion later lead to irritation. A fence that does not account for wind is also a risk, especially around house corners, on open plots, and in coastal areas.
Check in advance that the fence is entirely on your own property. Do not measure from an existing, possibly crookedly placed property boundary, but from the official plot boundary. Discuss the placement with neighbors if the fence will be on or near the boundary. This keeps the project clear and prevents discussion after the posts are already fixed.
For professionals, speed is important, but a consistent working method yields more than haste. Work from reference post to reference post, use a laser, and check each section before proceeding. The same applies to DIY enthusiasts: it is better to rent a good earth auger or laser level than to have to repair an entire line afterward.
With carefully placed composite posts, every fence gets the calm, neat base that suits a low-maintenance outdoor space. Choose components that fit together as a system, measure an extra time, and give the foundation the time it needs. Then your garden will remain tidy not only today but also in the seasons that follow.