Total: €0,00
Taxes and shipping calculated at checkout

A neat facade cladding stands or falls with its installation. Those looking for a tongue-and-groove cladding installation guide usually don't want theory, but clarity: what sub-construction do you need, how much space should you leave, and how do you prevent the final result from warping, skewing, or looking messy? Precisely there lies the difference between a quick installation and a finish that looks sleek for years to come.
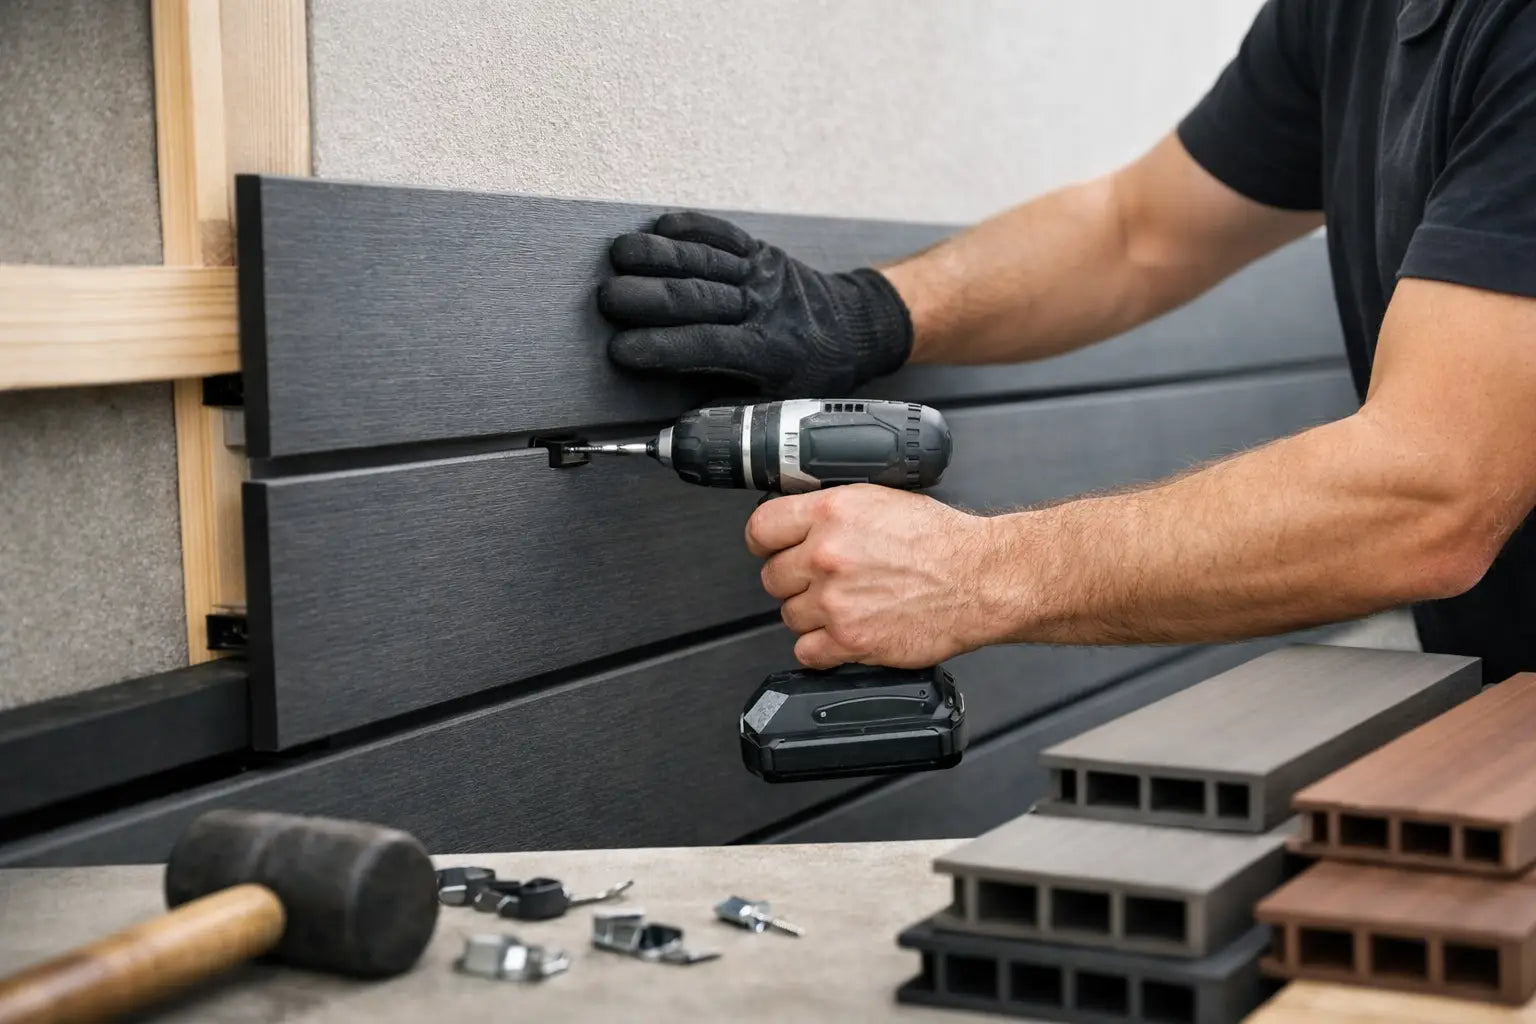
You never mount tongue-and-groove cladding directly onto a wall. The basis is always a stable, flat sub-construction. This is especially important for composite tongue-and-groove cladding, as it ensures proper ventilation, alignment, and fastening. A beautiful wood look only truly comes into its own when the lines are straight and the panels fit evenly everywhere.
For exterior facades, it's ideal to work with a framework that is well-aligned and resistant to moisture. The spacing of the battens depends on the type of tongue-and-groove panel, its thickness, and the application. When installed horizontally, the underlying battens are usually vertical. For vertical installation, you reverse that principle. It sounds logical, but in practice, it's surprisingly often done incorrectly.
Moreover, a facade must be able to breathe. Therefore, leave sufficient ventilation space behind the panels. This helps prevent moisture accumulation and contributes to a longer lifespan for both the tongue-and-groove cladding and the sub-construction. Those who only focus on speed during installation often pay for it later with a less sleek and less durable result.
Before fastening the first panel, check the substrate, the framework, and the dimensions. Measure the entire wall or facade at multiple points. No wall is perfectly straight, especially in renovation projects. If you start from a crooked base, every subsequent plank will carry that problem.
Therefore, always work with a reference line. That first line determines the rest of the project. Use a spirit level or laser and take your time before starting. This costs a few extra minutes but prevents corrective work across the entire width or height.
Also, check the edge finishing directly. Consider corner profiles, starting profiles, and connections at window frames or roof edges. Many installation errors don't occur in the middle of the facade, but precisely at the transitions. That's where you immediately see whether a system has been installed professionally or finished hastily.
The choice between horizontal and vertical installation is partly aesthetic and partly technical. Horizontal tongue-and-groove cladding often gives a calm, wide appearance. This works well for modern facades, garden rooms, and wall finishes around canopies. Vertical placement looks taller and slimmer, which can be interesting for narrow facade surfaces or accents in a sleek design.
Technically, the difference lies mainly in water drainage, batten direction, and detailing. Horizontal installation is most familiar to many DIY enthusiasts. Vertical installation often requires a bit more attention to the construction, especially if you want to maintain a good ventilation cavity and neat drainage. So, it's not that one direction is always better. It depends on the application, the visible work, and the installer's experience.
A good tongue-and-groove cladding installation guide is all about sequence. First, you place the sub-construction perfectly flat and square. Then, you finish the starting side with the correct profile or a neat starting solution. Only then do you start with the tongue-and-groove panels themselves.
Install the first panel with extra care. That first panel not only determines the line, but often also the joint size and the connection of all subsequent panels. After placement, immediately check if the panel is still level and properly secured or fastened according to the system you are using.
Then continue at a steady pace. Place a panel, check the fit, fasten, review the alignment. Those who quickly install multiple panels in a row without checking in between will only notice late that the line is off. Then you have to backtrack, which costs time and material.
With composite, expansion is a point you should take seriously. Therefore, always leave the prescribed dilatation or expansion space at the ends and at connections. Composite is low-maintenance and strong, but it remains a material that reacts to temperature differences. This is not a disadvantage, as long as you properly account for it during installation.
A sleek finish requires the correct fastening. Depending on the system, you work with clips, screws, or a combination thereof. Blind fastening often gives the most luxurious appearance because the surface remains calm. Visible screw heads can be functional, but they must be exactly in line. Otherwise, it quickly looks restless.
Always use fasteners that are suitable for outdoor or indoor application. Rust formation on incorrect screws can affect the appearance and, in the long term, the quality of the installation. So, don't skimp on small materials. In facade and wall finishing, that's rarely where you gain an advantage.
Also, pay attention to the screw tension. Overtightening is a classic mistake. This clamps the panel, restricting natural movement and potentially causing deformation. Too loose is also not good, because then you lose stability. Good installation is precise work, not hard work.
The most common mistake is a sub-construction that is not flat enough. You will see this later in shadow lines, tension on the panels, and a facade that never truly looks sleek. A second mistake is leaving too little room for ventilation and movement. This often goes well for a while, until temperature and moisture do their work.
The detailing around corners and window frames is also often underestimated. You don't want improvised solutions there, but a neat finish that visually completes the whole. The difference between average and professional often lies in that last 10 percent.
Another blunder is combining beautiful materials with a messy saw finish. Use sharp tools and clean up saw cuts. Especially with visible work, frayed edges or minimal size differences are immediately noticeable. Anyone investing in durable, low-maintenance tongue-and-groove cladding also wants the installation to meet that standard.
Tongue-and-groove cladding is not only used outdoors. They are also popular for interior walls, accent panels, and sleek finishes in commercial spaces or home offices. The installation is broadly similar, but indoors you generally deal less with moisture, wind, and larger temperature fluctuations.
As a result, interior applications can often be built somewhat more simply. Nevertheless, a flat framework remains important. Especially in modern interiors with clean lines, small deviations are particularly noticeable. Outdoors, the focus is more on ventilation, water management, and weather resistance. Indoors, the emphasis is more often on appearance and detailed finishing.
This difference is important if you are ordering material for multiple applications. Not every profile, every sub-construction, or every fastening method is automatically suitable for every space. Making a sharp choice beforehand saves you corrections on the work floor later.
Buying individual components sometimes seems more advantageous, but in practice, a complete system often works faster and neater. You then know that the tongue-and-groove panels, profiles, fastening, and finish are coordinated. This reduces the chance of installation problems and prevents searching during installation.
For professionals, this means predictability on the job. For DIY enthusiasts, it primarily means less doubt and a greater chance of a sleek end result. Especially for larger facade surfaces, visible locations, or projects where appearance carries significant weight, system thinking is usually the smartest choice.
WPC Solutions strongly plays into this with low-maintenance composite solutions that not only look beautiful but are also logically processable. That's exactly what you want if you want to install quickly without compromising on the finish.
Well-installed tongue-and-groove cladding immediately adds value to a facade, wall, or outdoor space. You get a sleek wood look without the recurring maintenance of traditional wood. No annual painting, fewer worries about weathering, and a much more consistent final appearance. This is not only pleasant to use but also smart for the long term.
At the same time, low-maintenance is not the same as fault-tolerant. Precisely because composite looks so sleek, sloppy installation is more noticeable. Therefore, it pays to work precisely from the first batten to the last finishing edge.
Anyone who installs their tongue-and-groove cladding calmly, squarely, and with the correct spacing is not only building a wall or facade cladding but a result that will still look well-maintained years from now. That is ultimately what a good guide is for.